header-bleepy-logo

DEVELOPERS

KO

시작하기

webview example image

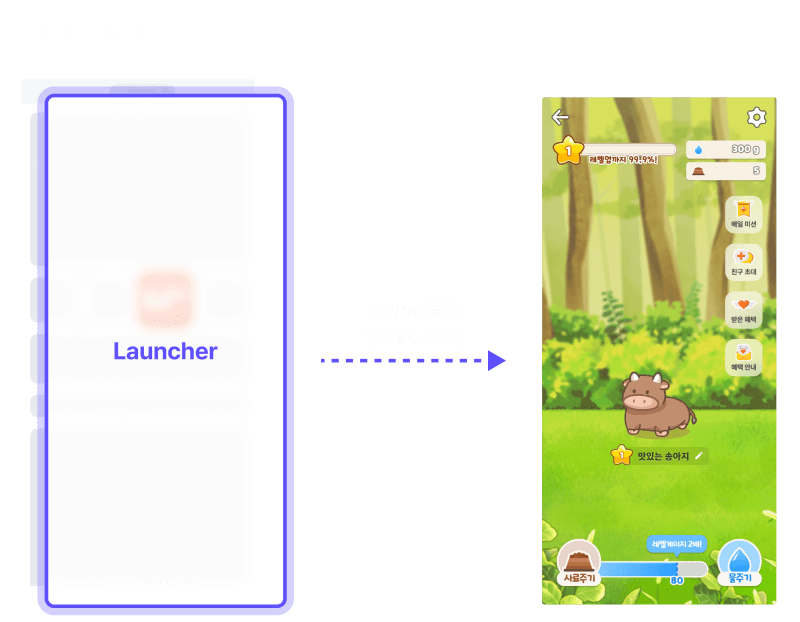
간편하게 웹뷰 URL 호출만으로 런처를 실행하고 Client Admin에서 프로모션을 생성하여 발급받은 Secret Key에 연동된 게임을 실행합니다. 웹뷰를 구성하여 게임을 실행하고 등록한 프로모션을 진행해보세요.


WebView 구성하기

React Native 가이드 문서는 Expo 버전, Vanila React Native 버전에 상관 없이 작성 가능합니다. 가이드는 아래 조건을 기준으로 작성 되었습니다.

1단계 : React-navigation 라이브러리 설치

스크린 이동을 위해 react-navigation 관련 패키지를 설치합니다.

shell
npm install @react-navigation/native

가이드는 Native Stack Navigator를 사용하여 작성되었습니다.

shell
npm install @react-navigation/native-stack

의존성(dependencies)을 가지는 라이브러리 설치가 필요합니다.

shell
npm install react-native-screens react-native-safe-area-context

IOS용 개발의 경우 [Cocoapods] 를 통해 Pod 설치가 필요합니다.

shell
npx pod-install ios

2단계 : 블리피 런처스크린 화면 구성

React Native 프로젝트 내에 블리피 런처를 구동하기 위해서는 WebView 를 포함하는 스크린이 필요합니다. 다음 가이드를 따라 진행해주시기 바랍니다.

1. 런처 스크린 화면 파일 생성

src 아래 screens 폴더 내에 런처 스크린 화면을 추가합니다. 가이드에서는 src/screens/launcher/Launcher.tsx 로 작성하였습니다.

2. Navigation 라우팅 추가

App.tsx 파일에서 Navigator 관련 정의를 추가합니다. Stack Navigator를 사용하며 하위로 사용할 Screen에 해당하는 Stack을 생성합니다. 이 때 Stack.Screenname 값이 route 경로가 되며 component 는 보여주고 싶은 Screen 컴포넌트가 됩니다. 예시 가이드에서는 launcher , banner 2가지 Screen을 사용하였습니다.

typescript
// App.tsx import {NavigationContainer} from '@react-navigation/native'; import {createNativeStackNavigator} from '@react-navigation/native-stack'; import HomeScreen from '@screens/home'; import LauncherScreen from '@screens/launcher'; const Stack = createNativeStackNavigator(); export type RootStackParam = { launcher: undefined; banner: {url: string}; }; export default function App() { return ( <NavigationContainer> <Stack.Navigator screenOptions={{headerShown: false}}> <Stack.Screen name="launcher" component={LauncherScreen} /> <Stack.Screen name="banner" component={BannerScreen} /> </Stack.Navigator> </NavigationContainer> ); }

3. WebView에 런처 URL 로드

React Native에서 WebView 를 사용하기 위해서 react-native-webview NPM 라이브러리를 설치해야 합니다.

shell
npm i react-native-webview
런처스크린 내에 WebView 컴포넌트를 추가하고 {런처 URL}을 요청합니다.
  • 자바스크립트 활성화를 위해 javaScriptEnabled 값을 true 설정합니다.
  • IOS의 경우, 디바이스 메모리 관련 Terminate 발생 시 reload 처리가 필요합니다.
    • WebView 관련 ref 선언을 추가합니다.
    • WebView 컴포넌트 내 onContentProcessDidTerminate 콜백을 통해 reload 처리합니다.
typescript
// src/screens/launcher/Launcher.tsx import { WebView } from 'react-native-webview'; import { useRef } from 'react'; export default function Launcher() { const webviewRef = useRef<any>(); ... return ( ... <WebView ref={webviewRef} source={{ uri: {런처 URL} }} onMessage={onMessage} onContentProcessDidTerminate={() => { // webview reload webviewRef.current?.reload(); }} javaScriptEnabled={true} /> ... ) }

3단계 : onMessage 설정 추가

블리피 런처와 React Native의 통신을 수행하기 위해 런처 스크린에는 WebViewonMessage 콜백을 정의합니다. WebView 에 로드된 블리피 런처 React Native로 메세지 이벤트를 전달합니다.

아래 표는 블리피 런처와 React Native 클라이언트가 통신하는 케이스입니다.

Type

Description

closeLauncher
블리피 런처의 Back 버튼 UI 클릭 시 (뒤로가기 처리)
typescript
// src/screens/launcher/Launcher.tsx import {WebView, WebViewMessageEvent} from 'react-native-webview'; export default function Launcher() { // WebView에서 보내온 메세지 처리 const onMessage = (e: WebViewMessageEvent) => { const {type, inviteCode, infoMessage, link} = JSON.parse(e.nativeEvent.data); switch (type) { case 'closeLauncher': closeLauncher(); break; } }; return ( <View> <WebView ... onMessage={onMessage} ... /> </View> ); }

1. closeLauncher()

블리피 런처의 Back 버튼 UI 클릭 시 React Native에서는 뒤로가기 처리를 수행합니다.

typescript
// src/screens/launcher/Launcher.tsx // 런처 종료 const closeLauncher = () => { if (navigation.canGoBack()) { navigation.goBack(); } };

4단계 : 런처 스크린 세로모드 고정 로직 추가

게임이 제공되는 런처 스크린은 화면 자동 회전이 불가능 하도록 세로모드 고정이 필요합니다. React Native에서는 세로모드 고정을 위해 react-native-orientation-locker 라이브러리를 설치합니다.

shell
npm install --save react-native-orientation-locker
  • 세로모드 고정 코드를 추가합니다.
  • typescript
    // 추가 import Orientation from 'react-native-orientation-locker'; export default function Launcher() { ... // 추가 useEffect(() => { // 화면 방향을 세로로 고정합니다. Orientation.lockToPortrait(); return () => { // clean-up에서 다른 스크린에 영향 없도록 Orientations 해제 Orientation.unlockAllOrientations(); }; }, []); return ( <View> <WebView ... /> </View> ); }
    • IOS 환경에서는 추가 설정이 필요합니다.
      • /ios/AppDelegate.m 파일을 열고 아래 코드를 추가합니다.
      • pod install 실행합니다.
    objectivec
    // AppDelegate.m or AppDelegate.mm // 추가 #import "Orientation.h" @implementation AppDelegate ... // 추가 - (UIInterfaceOrientationMask)application:(UIApplication *)application supportedInterfaceOrientationsForWindow:(UIWindow *)window { return [Orientation getOrientation]; } ... @end

개발에 대한 추가 설명이 더 필요하신가요?

"[Client Admin] 로그인 → 오른쪽 하단 채널톡 위젯" 클릭 후 개발 카테고리에 문의 남겨주시면 기술 개발팀에서 확인 후 연락드리겠습니다.


v1.0.6